
This article will show you how to install PyCharm for use with my Python courses on Linkedin Learning.
Note to users of my 2017 Python Essential Training course
When this course was originally recorded I recommended using Komodo Edit as the editing environment. Unfortunately, Komodo Edit is no longer being developed nor supported and it no longer works properly on current Mac and Windows systems.
If you choose to use PyCharm instead, and it’s an excellent choice, keep in mind that your screen will look different than my screen in the lesson videos. That’s because I recorded those lessons earlier using Komodo Edit.
Installing Python and PyCharm
To follow along with the exercises in my Python courses, you will need a working installation of Python and a good development environment, like PyCharm.
You can install the latest version of Python by downloading the installer from python.org/downloads and following the instructions there.
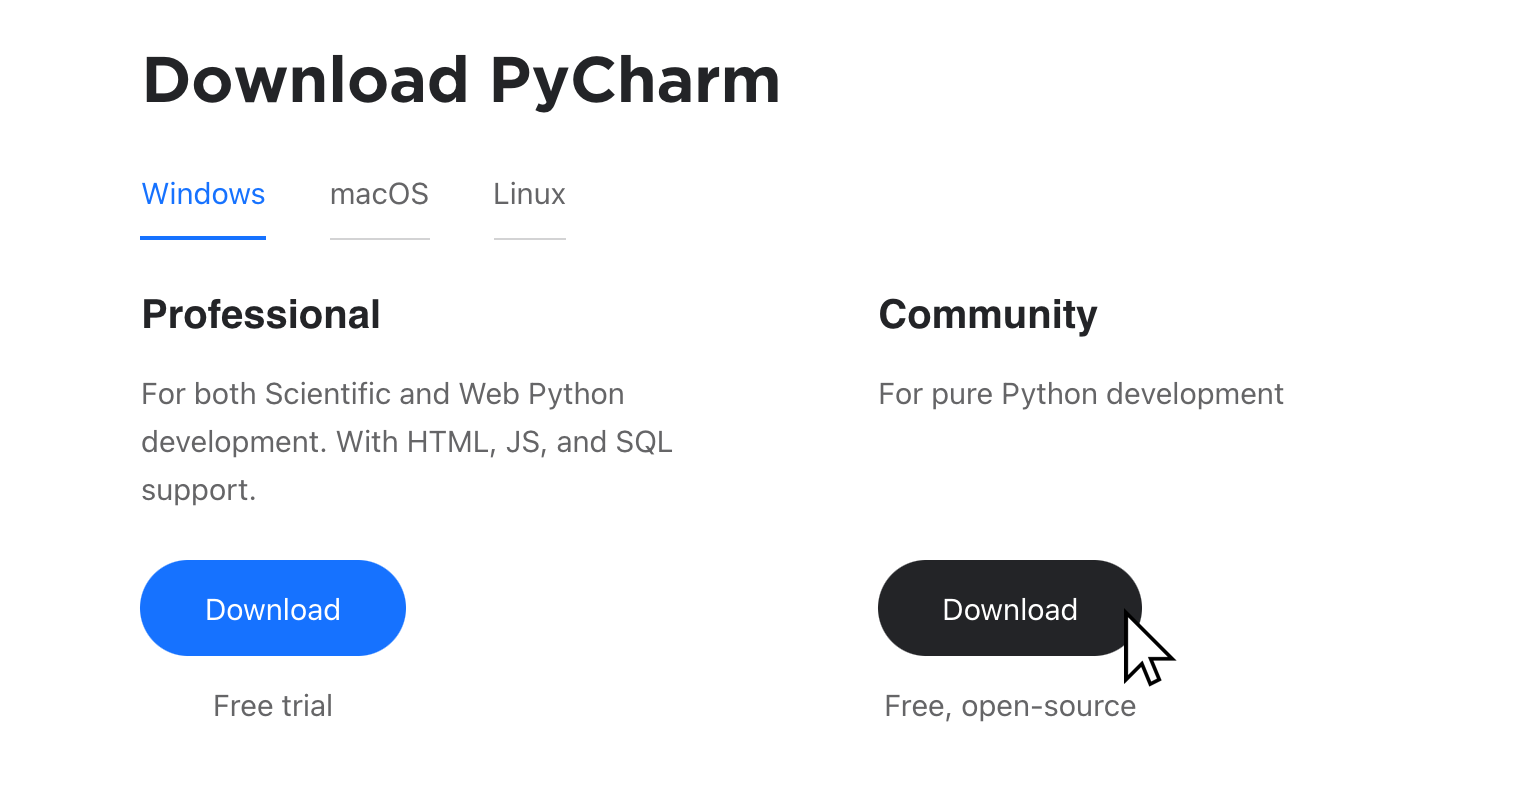
You can download PyCharm from jetbrains.com/pycharm/download. For most purposes, you will not need the Professional edition. I recommend the Community edition for most purposes.
Download the Exercise Files
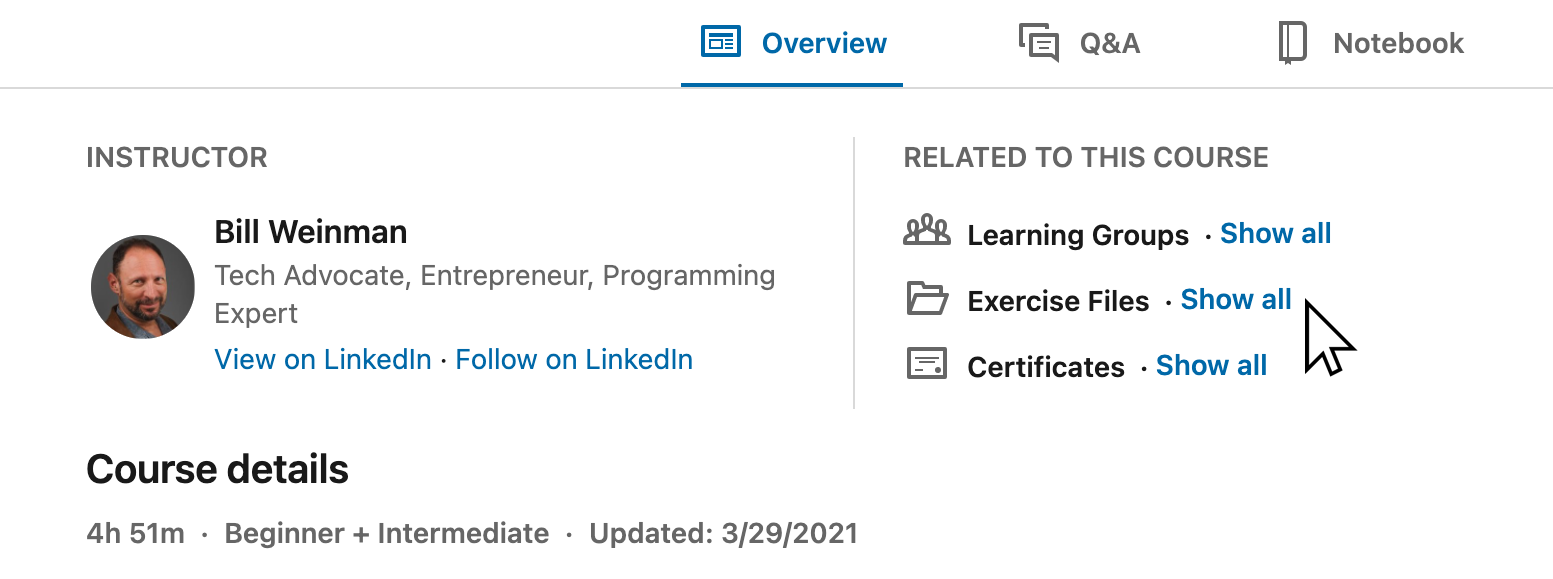
If you have not already downloaded the exercise files for the course, you can do that from the course page on the Overview tab.
Save the ExerciseFiles directory on your desktop or somewhere you can find it.
Open the Directory
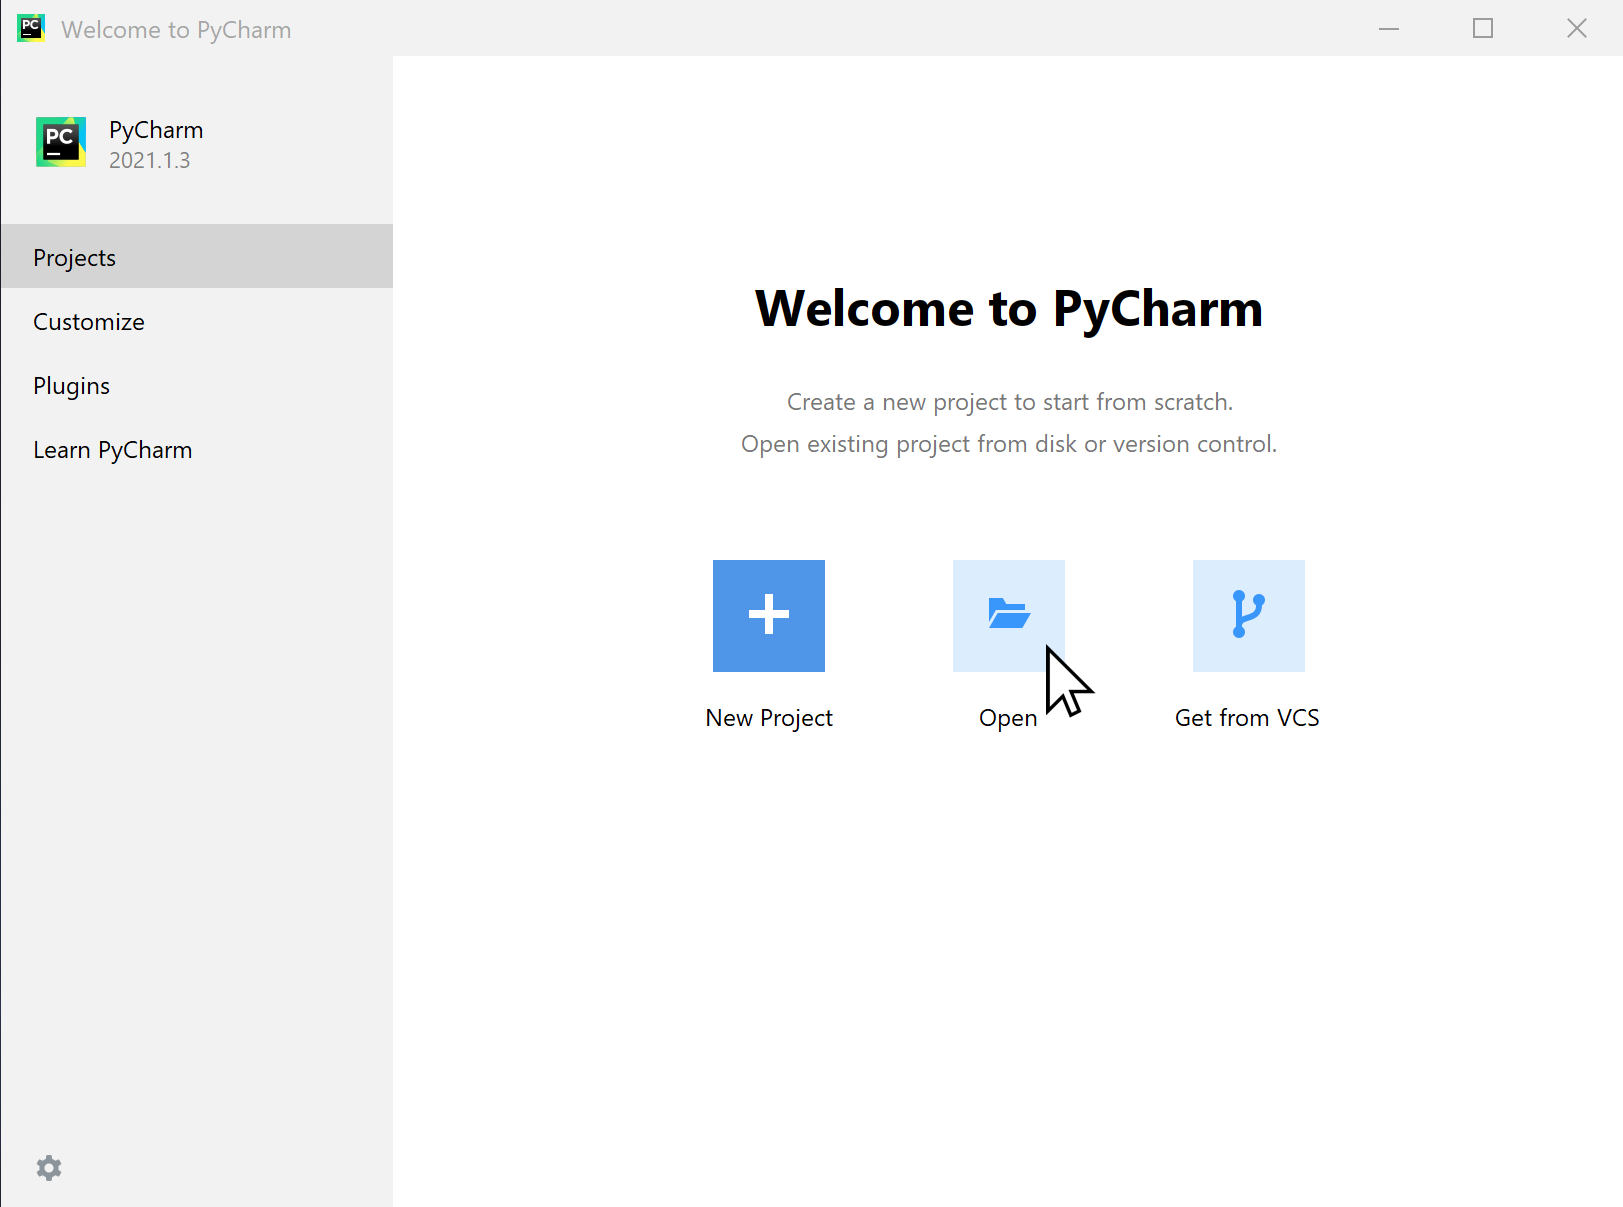
Once downloaded and installed, you can run PyCharm. Select Open to open a directory, then select your ExerciseFiles directory from the desktop or wherever you saved it.
Setup the Interpreter
Open the Preferences:
Mac: CMD-<comma> or PyCharm -> Settings
Windows: CTRL+ALT+S or File -> Settings
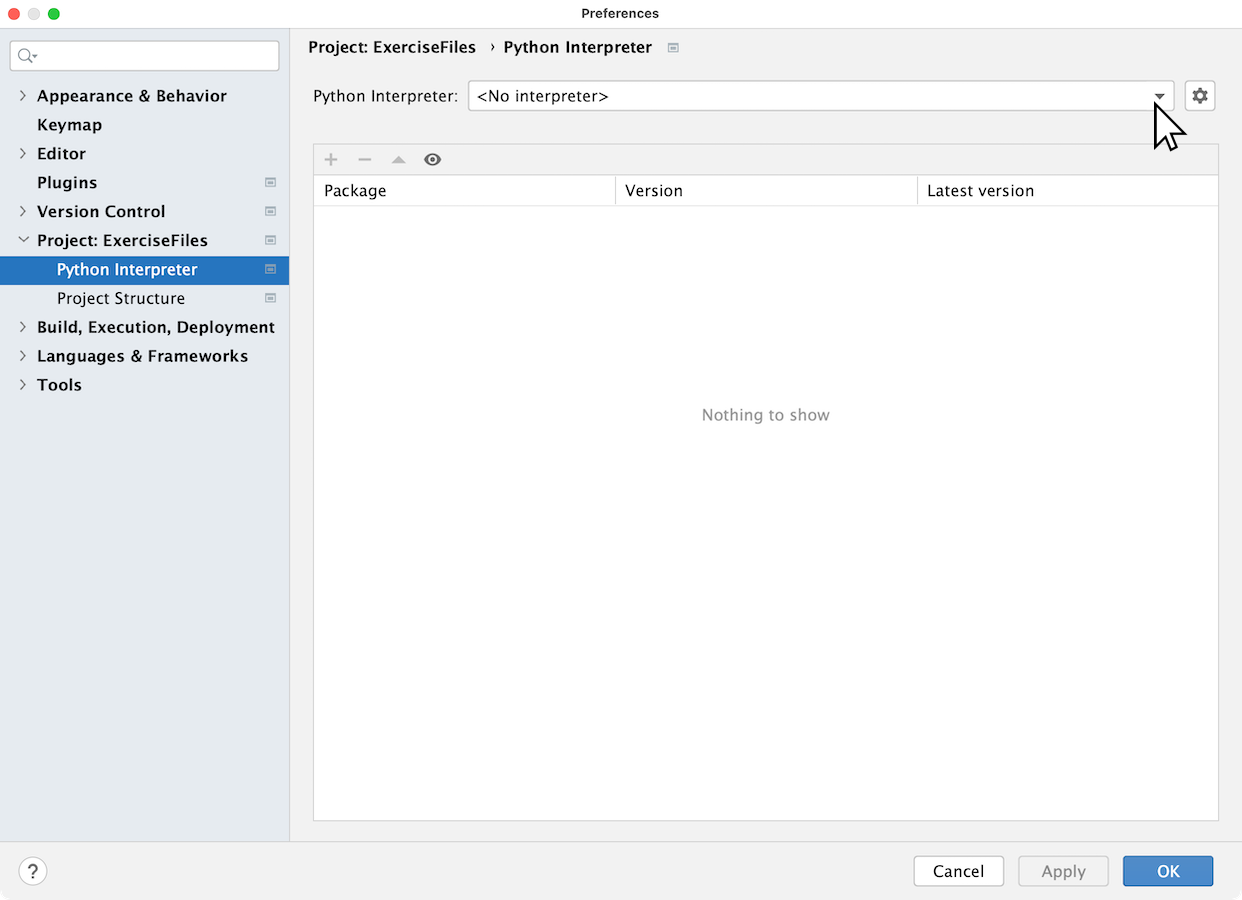
Navigate to the Project -> Python Interpreter settings as shown in the above screenshot.
If your Python Interpreter already shows the version of Python that you just downloaded, then you’re good and you can move on!
Otherwise, press the “gear” icon and select “Add…”
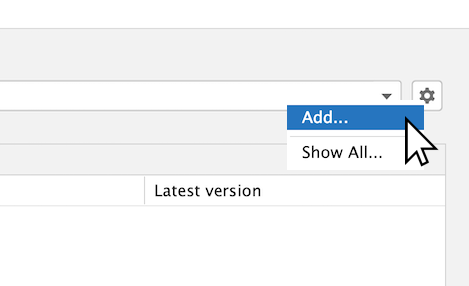
You will now see the “Add Python Interpreter” screen.
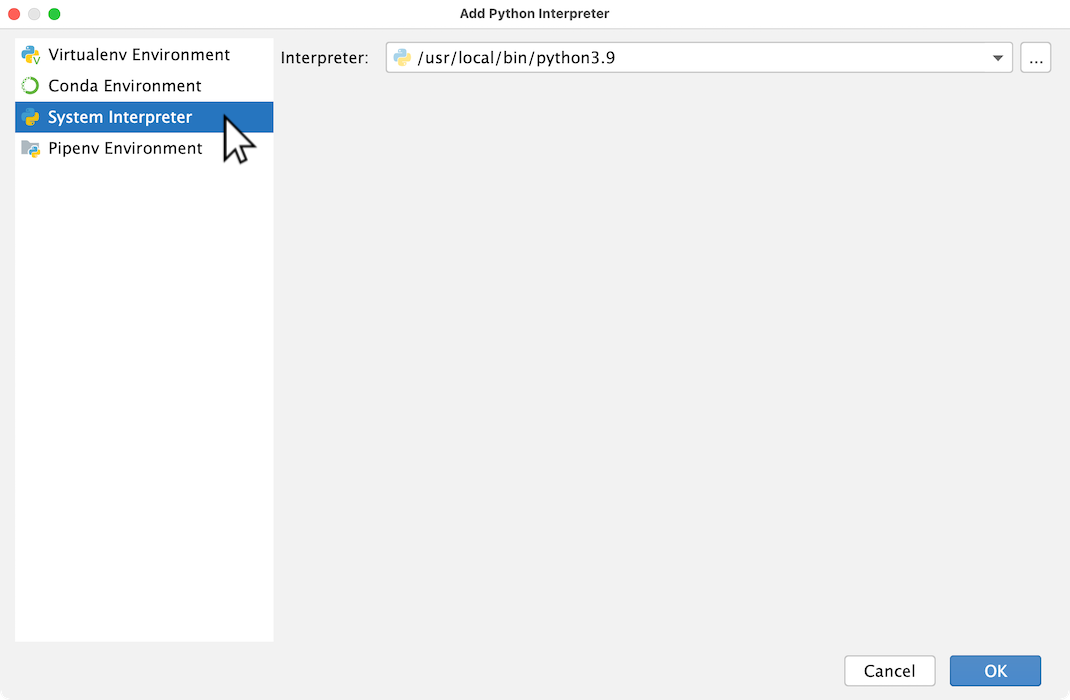
Be sure to select “System Interpreter” from the left side. You don’t need a virtual environment for these exercises and any of the other choices will only add unnecessary complexity to the process. Just select “System Interpreter” and make sure the latest version of the python interpreter is selected in the “Interpreter” list at the top of the window.
Press “OK”, and “OK” again to exit the preferences window.
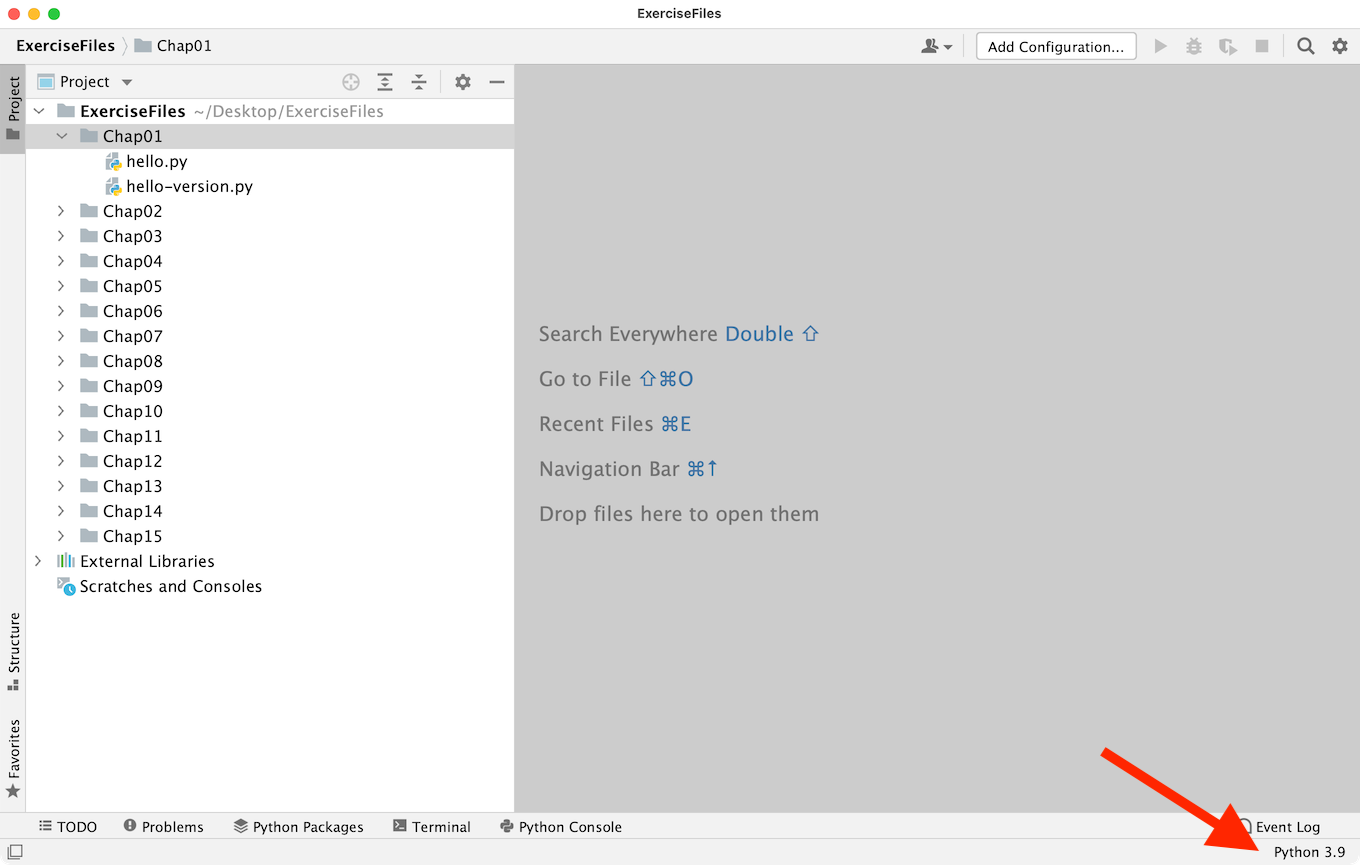
You should see the correct Python interpreter version at the lower-right of your main window.
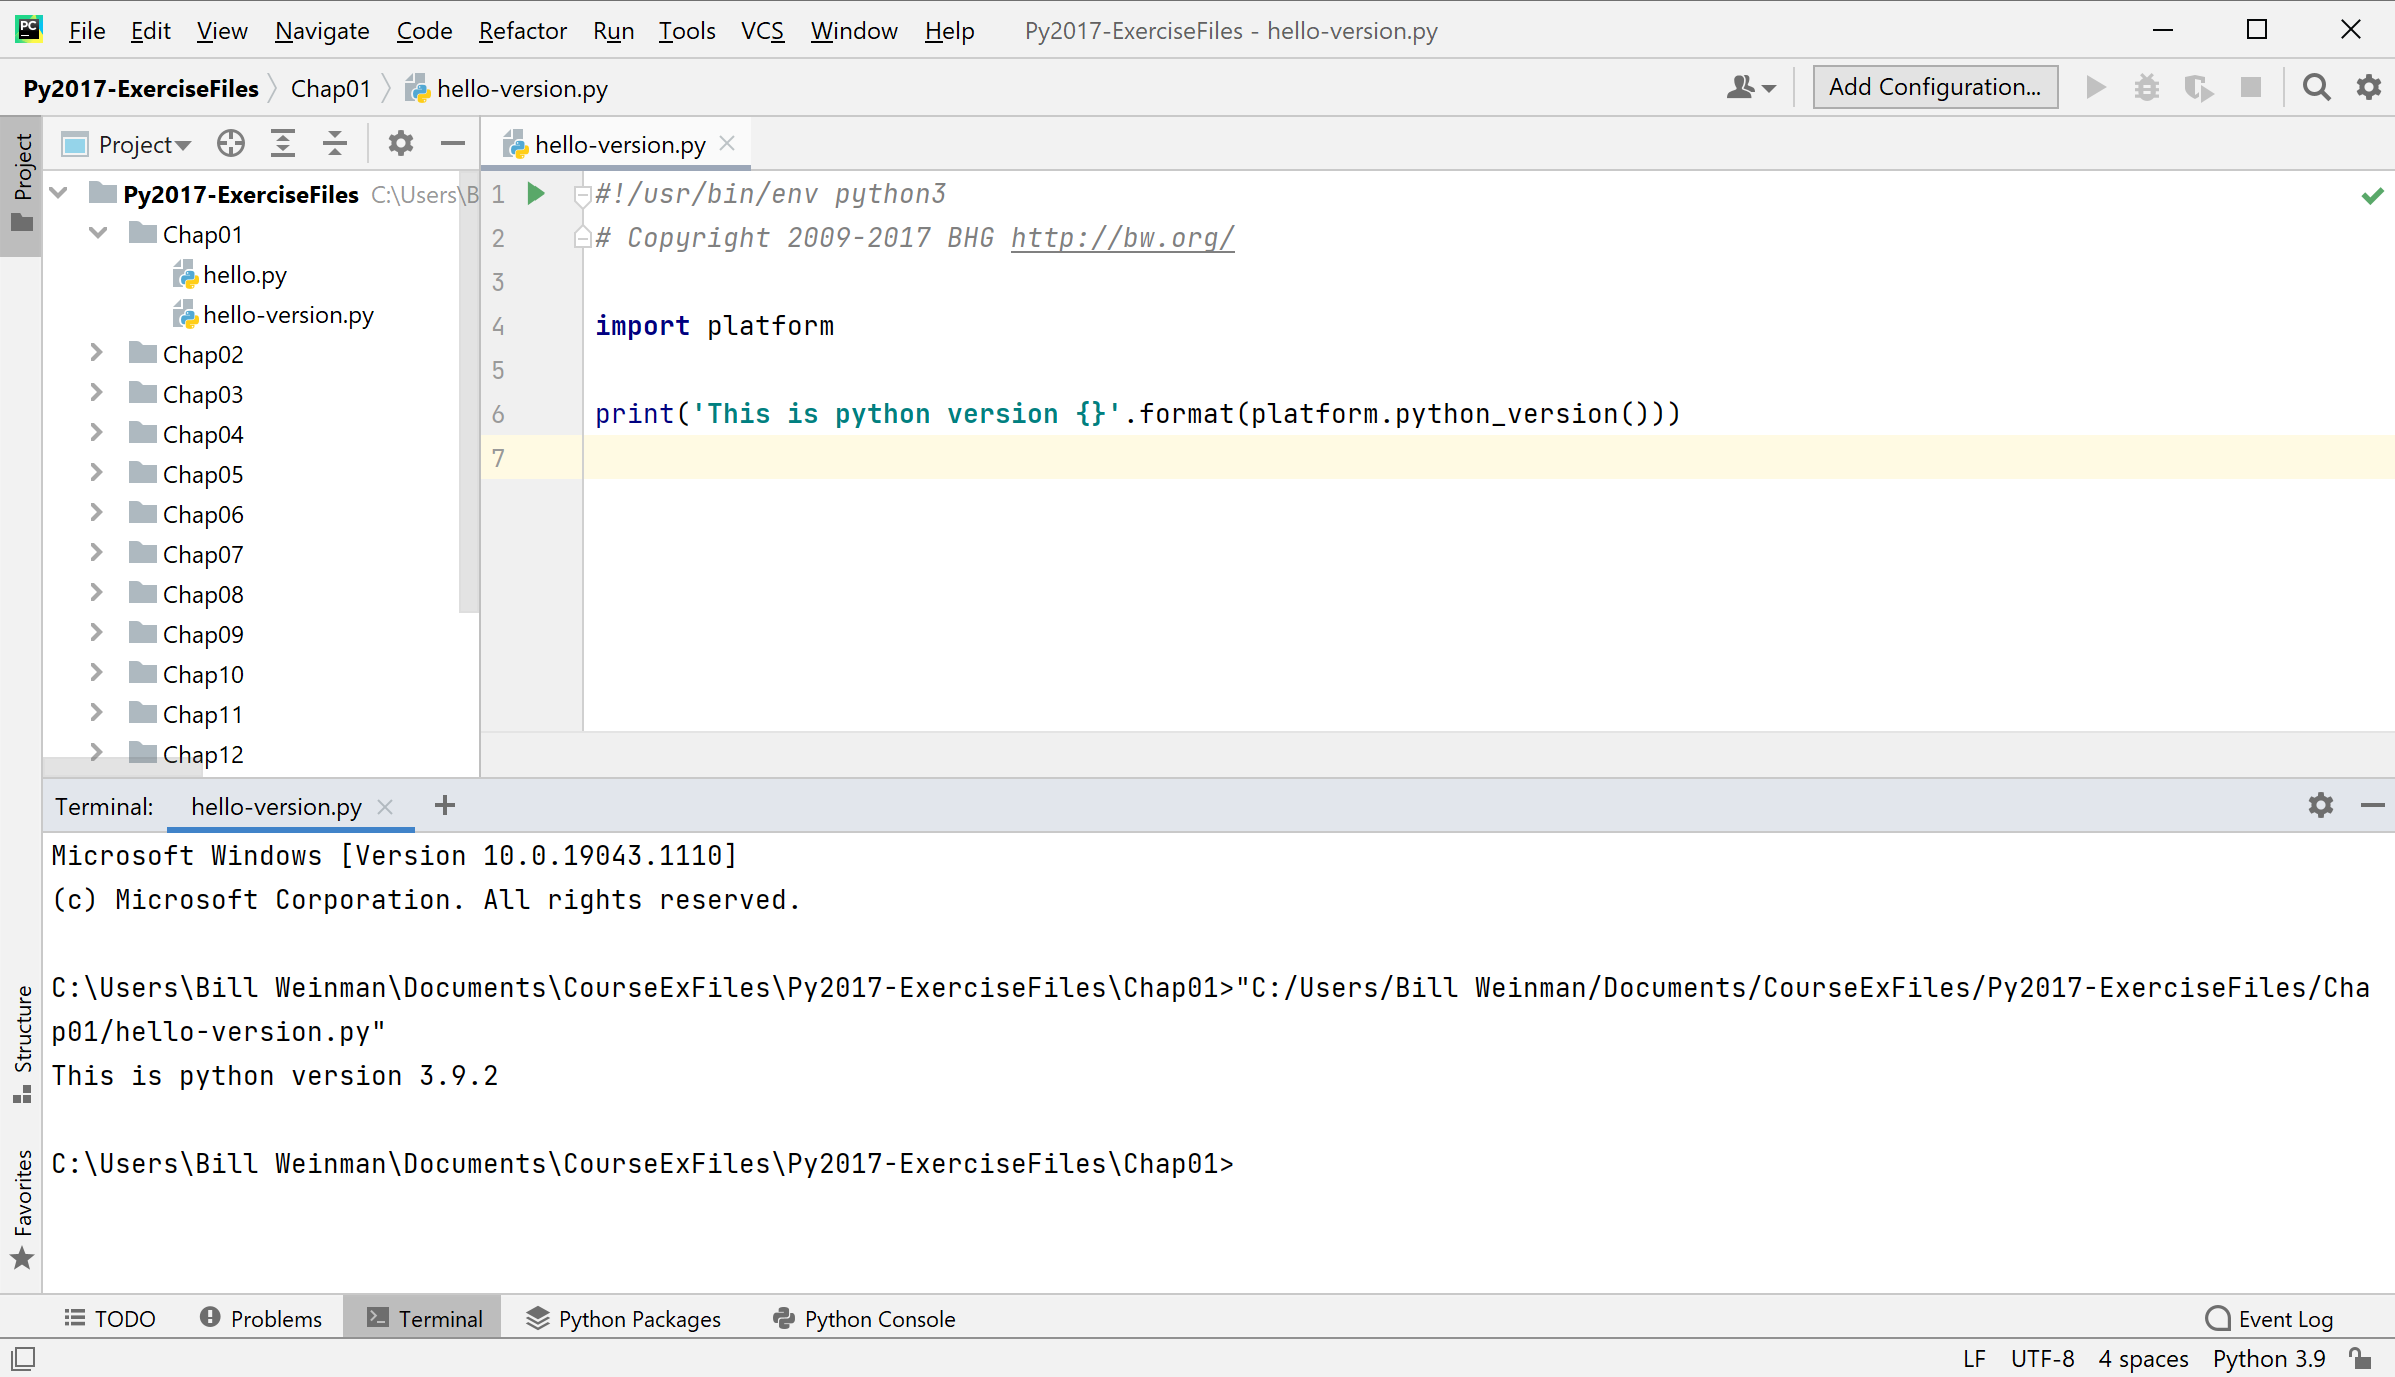
Run an example file
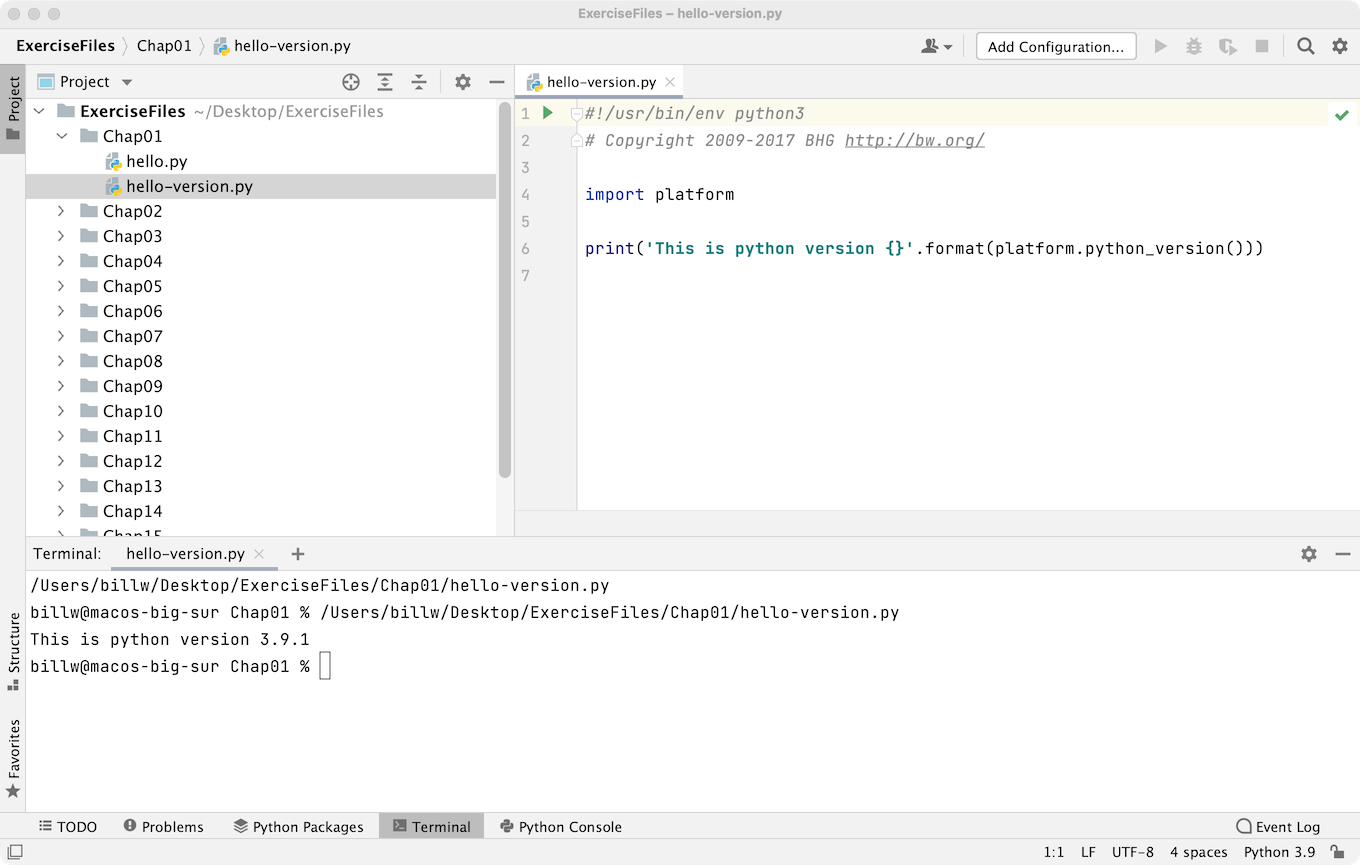
Open the Chap01 folder, if it’s not already open, and double-click the “hello-version.py” file to open it in the editor window.
This is a short Python script that will simply report the version of Python you’re using. Run it by pressing:
Mac: CTRL+SHIFT+R
Windows: CTRL+SHIFT+F10
To close the terminal window, make sure it’s selected and press:
Mac: CTRL+D or CMD+W
Windows: CTRL+SHIFT+F4
Warning about PowerShell
If you’re using PyCharm with Windows, it may try to use PowerShell to run your code. This doesn’t seem to work.
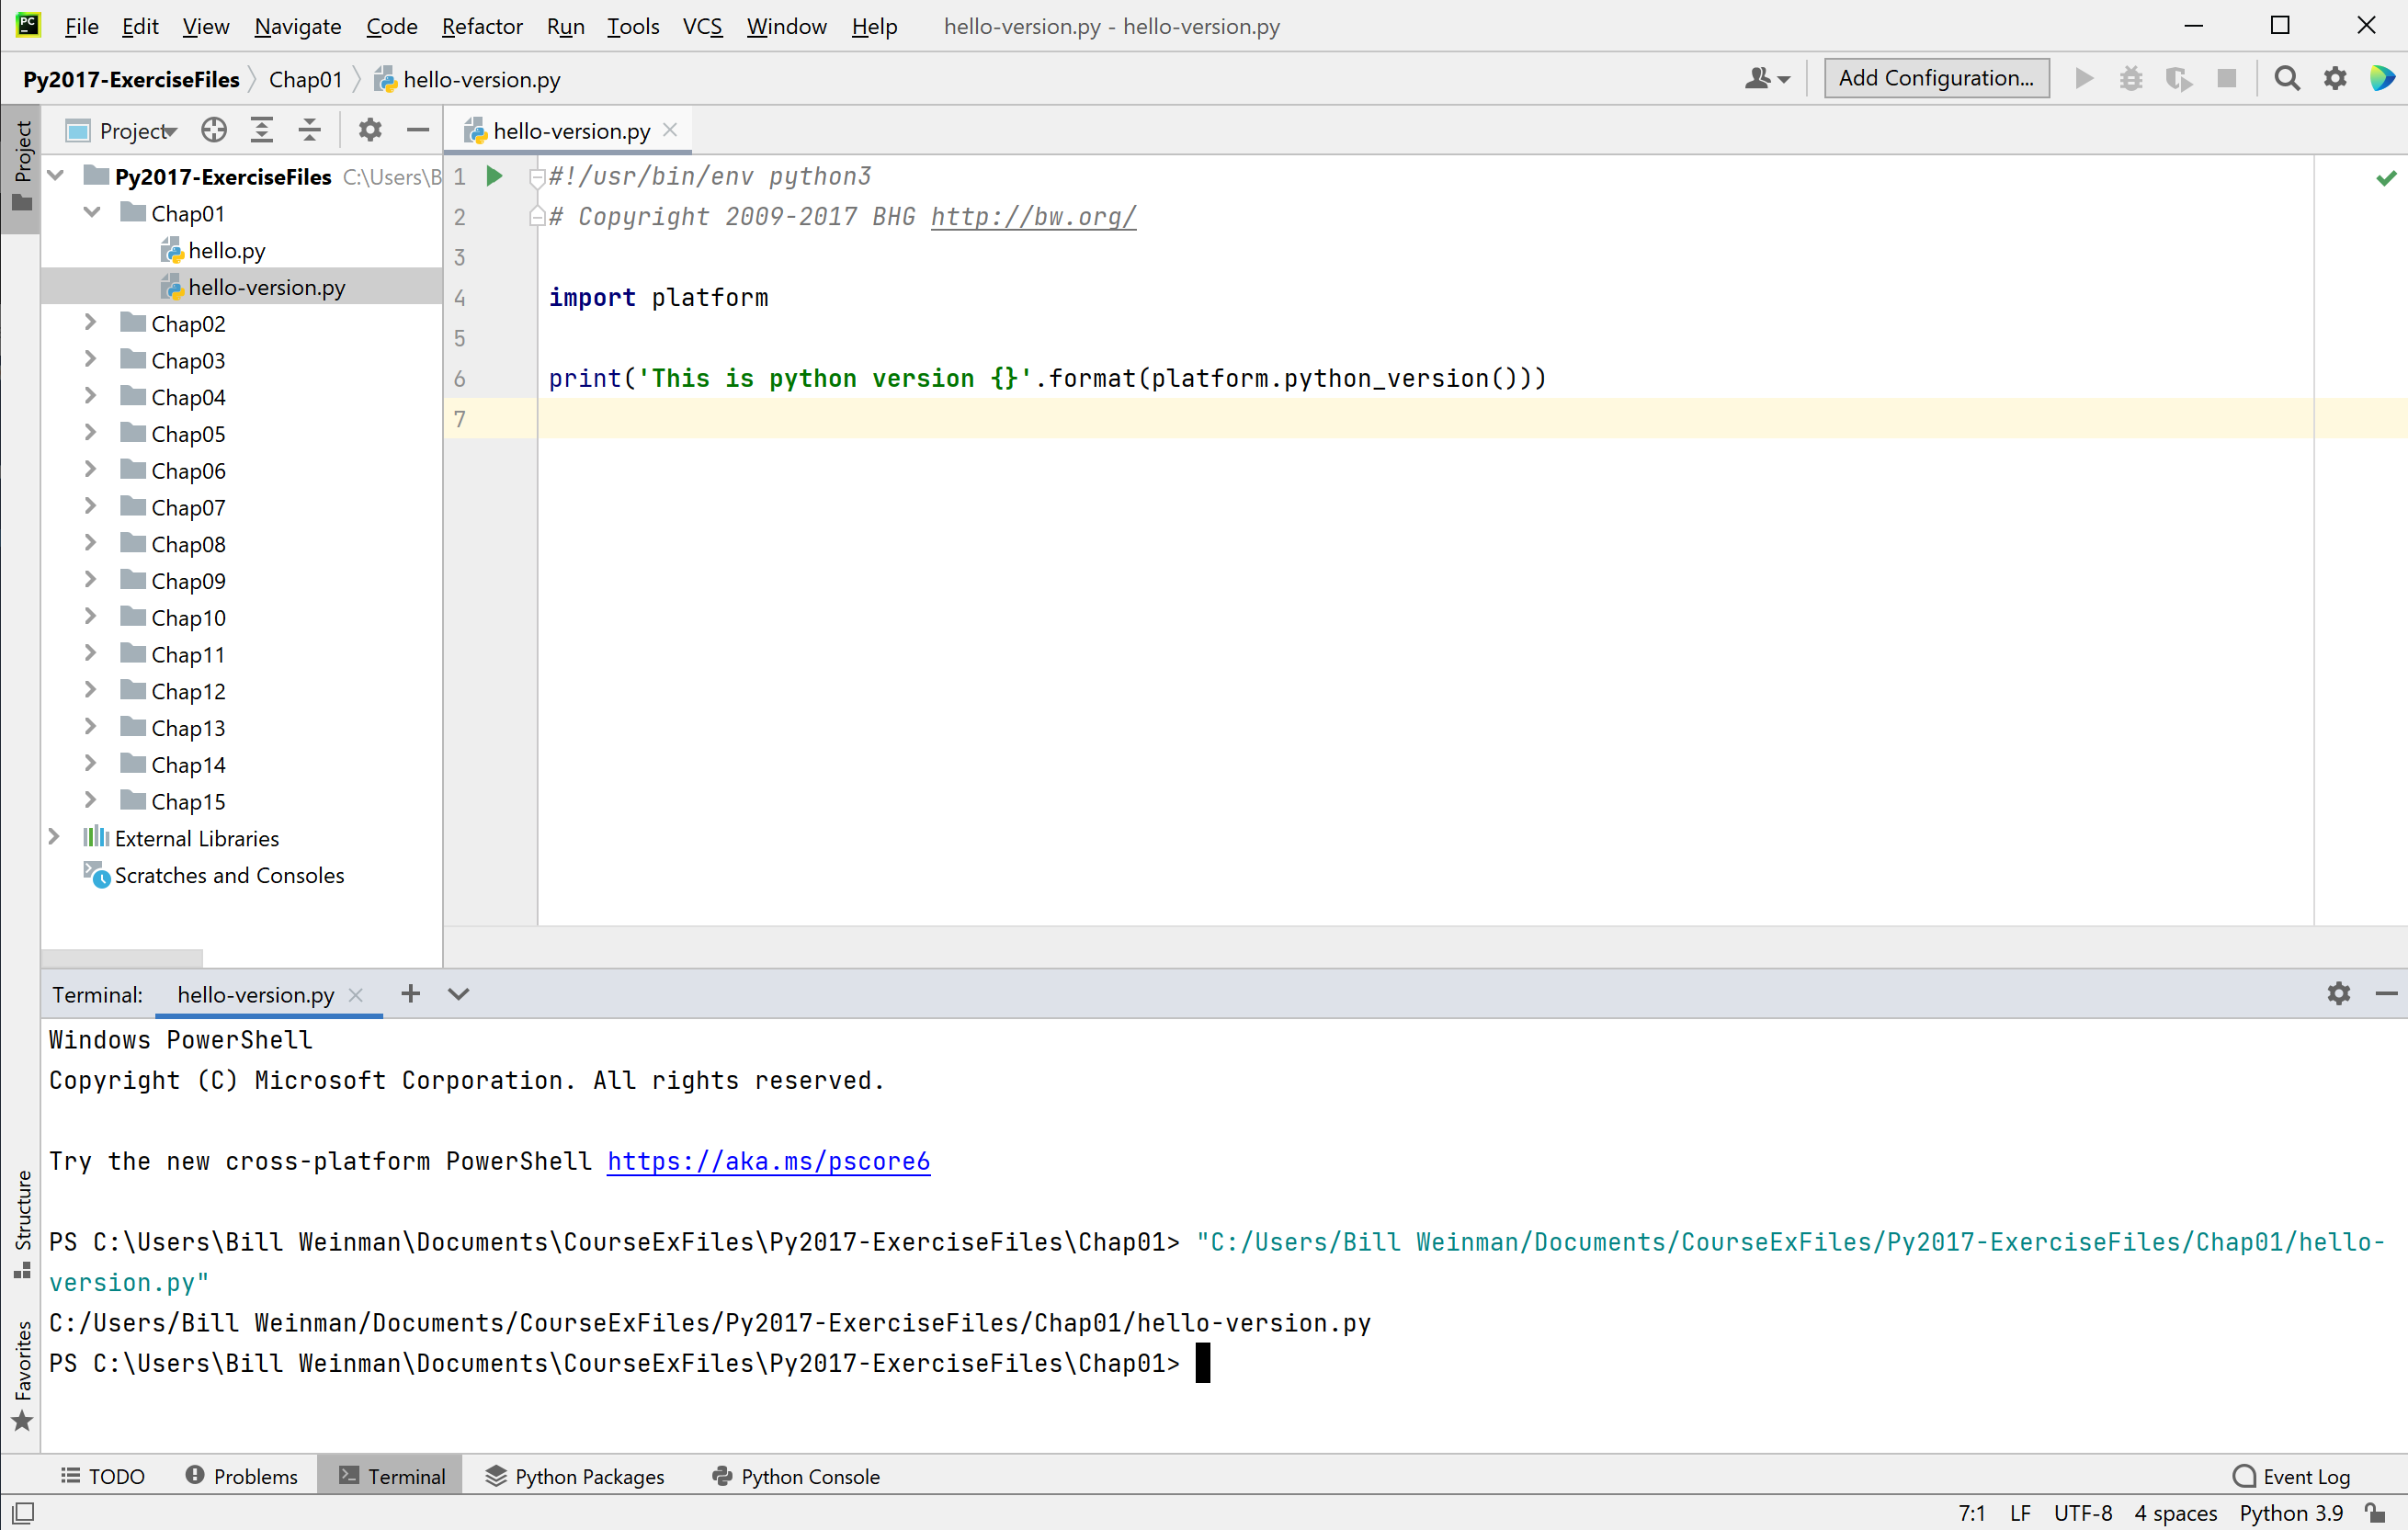
I recommend you configure PyCharm to use cmd.exe instead of PowerShell. Open Settings and select Tools -> Terminal. Under Application Settings and Shell path, select cmd.exe and press OK.

Now PyCharm should run your Python scripts properly in the Terminal window.
Disable PEP-8 warnings (optional)
You may notice that some of the files in my Python Essential Training (2017) course bring up warnings. For example, open hello-main.py from the Chap02 folder. Now select “Problems” from the tabs at the bottom of the window.
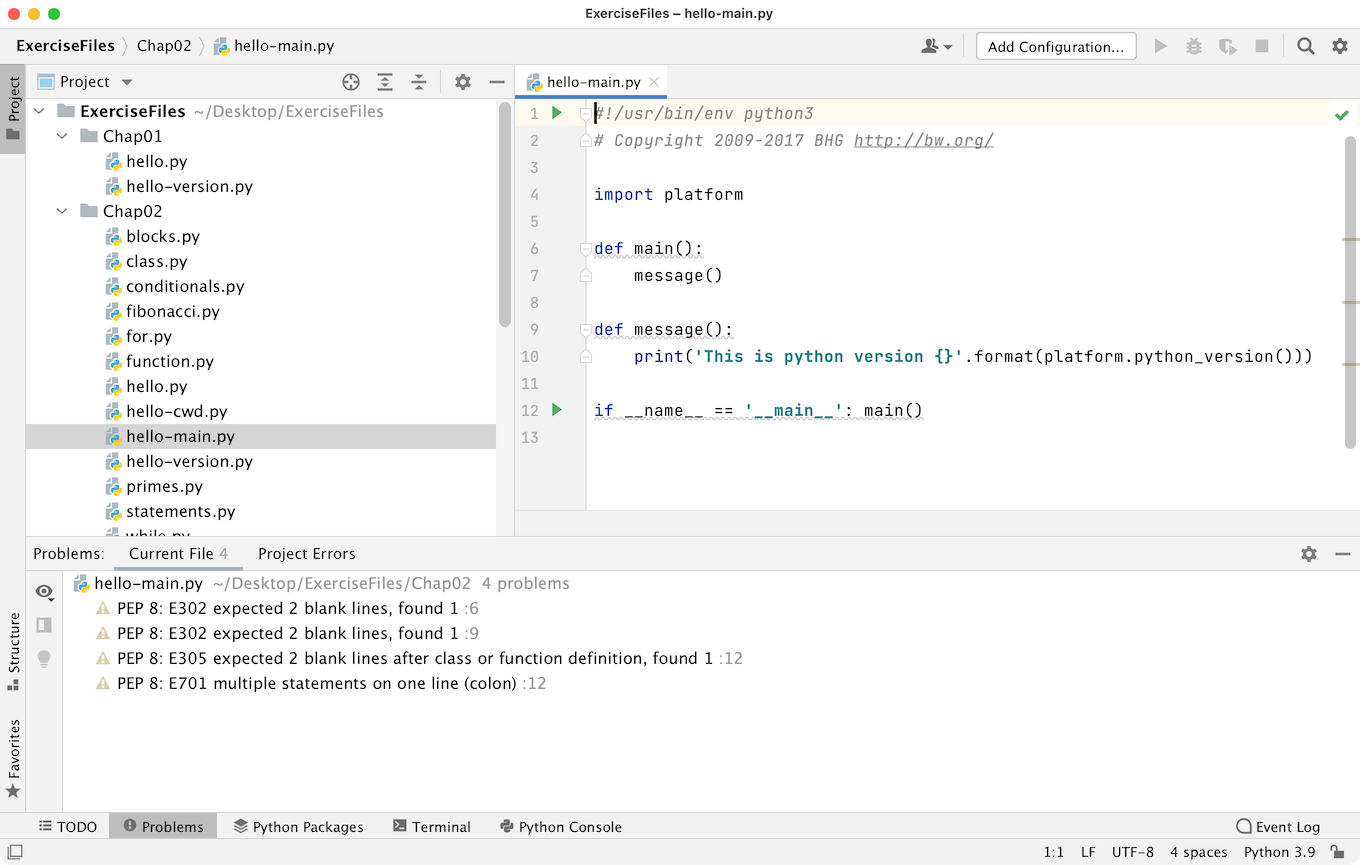
These are warnings, not errors. The code will run fine. These warnings, are designed to enforce the PEP-8 coding style.
PEP stands for Python Enhancement Proposals. These are like RFCs, Requests for Comment. They are not standards, they are proposals from the designers of the Python language. The purpose of PEP-8 is to help you write code with consistency, so it’s readable by yourself and other humans.
My coding style is consistent across languages and across projects. So I’ve always used my style instead of the PEP 8 style. This was never an issue until I opened my code in PyCharm.
I encourage my students to develop a style and stick to it consistently. This will make your code more readable, and code is generally read far more often than it is written. So feel free to use the PEP-8 standards if you like.
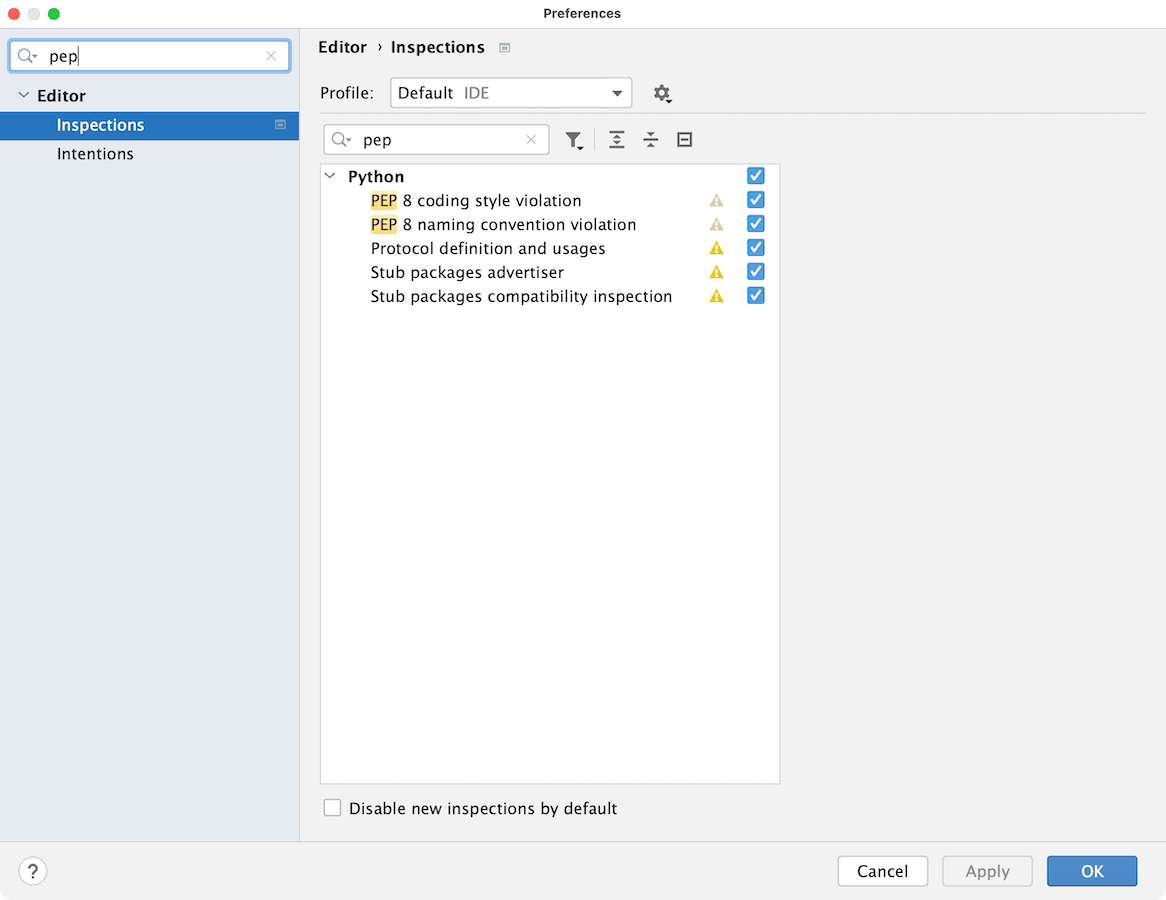
These warnings make it easy to use the PEP-8 coding style. You may keep the warnings on, or turn them off, as you prefer.
To turn off the warnings, navigate to the PyCharm Preferences and type “PEP” in the search box. Now you can uncheck the boxes for PEP 8.
Installation Complete
Python and PyCharm are now installed and working and you’re ready to continue the course. Don’t forget: If you’re using my 2017 Python Essential Training course, your screen will look different than my screen in the lesson videos because I recorded those lessons earlier, using Komodo Edit.
Share This
![]()
![]()
![]()
Take my advice. I don't use it anyway.

The lawyers made me say it: Some links may be affiliate links and I may be compensated if you make a purchase after clicking on them.